

Camera Gear for Filming a Backcountry Hunt
Camera Gear for Filming a Backcountry Hunt
By Jason D.B. Kauffman
You’re not alone if you’re considering tossing a video camera, tripod and maybe even an action camera into your pack so you can document your next backcountry hunting adventure. With the incredible pace of improvements to modern camera systems—even consumer-oriented cameras—capturing cinematic footage on the hunt has never been a more accessible possibility.
But what is the correct camera option for you? That depends on a number of factors, including the kind of weight you want to carry (or don’t mind carrying), the kind of image you want from your camera, and smaller but not insignificant details like how much “reach” you want in a telephoto lens.
In the following paragraphs I will provide details on two distinct filming setups—the first being a simple and lightweight approach that I’d recommend for the first-time or solo, ounce-counting backcountry filmmaker, and the second a more complicated and thus heavier setup for the experienced backcountry filmmaker looking to capture a hunt in the most cinematic way possible.
While nearly every camera geek like me dreams of filming on a Red Digital Cinema camera, I’ve concluded that systems like these are not practical for most backcountry scenarios where the ability to move fast and light as a one or two person run-and-gun filming team is of paramount concern. While I’ll provide my own recommendations for what I think is the best equipment to use for each of the two categories I detail based on what I use, do keep in mind that there are other similar makes and models that can substituted out for each of the pieces of equipment that I recommend.
A final word of caution before we get started. Neither of the recommended setups below can truly be called lightweight. Hauling a primary video camera, maybe even a secondary action cam, as well as a tripod and enough battery power to meet all your needs will undoubtedly add considerable weight to your pack. I don’t say this to try to convince you not to film your hunt, but more to apprise you of the additional considerations you’ll face as you work to lighten your pack before setting out. Last, this is what we use, but there are many different gear setups that you can use that can work really well. So this is our opinion, but it isn't scripture.
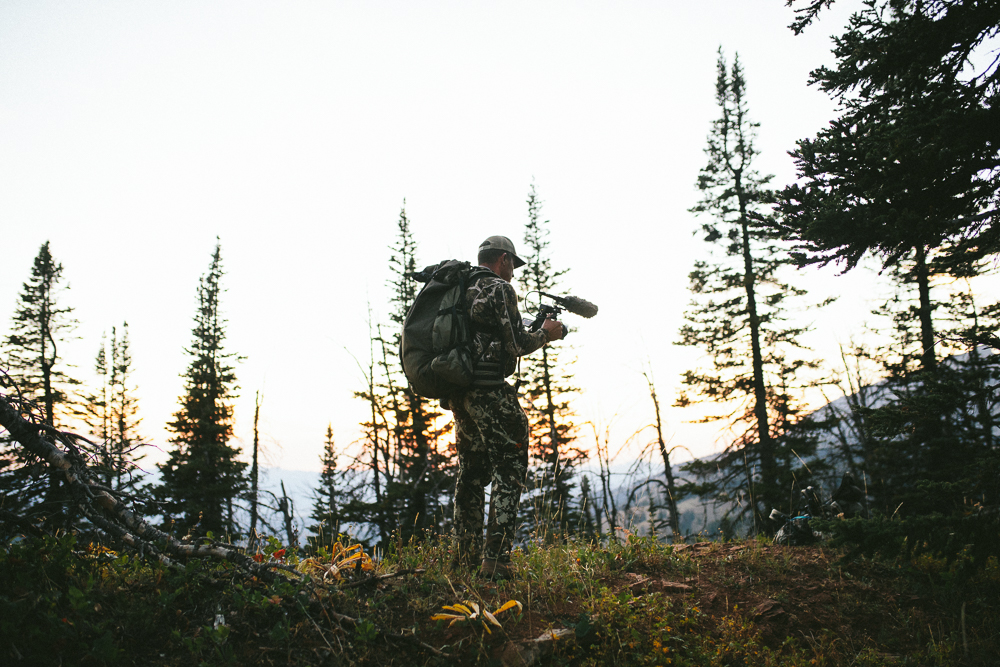 _Trying to get those early morning shots when the light is best can add a lot of cinematic quality to a film_
Backcountry filmmaking — The (sort of) minimalist filming kit
1\. Primary camera — Sony FDR-AX100 4K Ultra HD Camcorder
This is the camera we use for filming solo hunting adventures, particularly when self-filming. This 4K-capable camcorder delivers a solid image in a compact, fairly lightweight package. Large for such a small camcorder, its one-inch sensor translates into a pretty decent low-light camera. But what I truly like is its integrated 12x optical zoom, which gives you a 35mm full-frame equivalent 29-348mm focal range. That means you can capture fairly expansive landscape shots, along with an ability to zoom in quite far to film that large bull elk or muley buck the next ridge over. The camera’s 3.5 inch LCD screen can be positioned in multiple directions, including selfie mode when you need to speak into the camera to update viewers on the hunt or retell the story of your successful stalk. The camera’s Optical SteadyShot Image Stabilization system does a decent job of steadying out handheld shots, an important consideration if a majority of your shots are not from a tripod. Bonus: the camera’s Sony NP-FV70 batteries hold a long-lasting charge.
2\. Action camera — GoPro Hero 7
Despite all things that drive me crazy about GoPro action cameras—poor battery life, extreme wide-angle view, and a tendency to accidentally get turned on inside your pack—I never head into the backcountry without one. And the newest iteration in the long-running GoPro lineup—the Hero 7—looks to be a revelation. In this model, GoPro has introduced what they are calling “HyperSmooth Video Stabilization.” From everything I have seen, this feature is the real deal. If it can smooth out footage taken from a ski helmet or the handlebars of a mountain bike—and it sure looks to—then it shouldn’t have trouble smoothing out footage from your stalk or during your shot while attached to your head or bow. Matched with footage from your primary camera, the GoPro adds a useful first person point of view perspective for storytelling.
3\. Tripod — any sturdy hunting tripod
Should you bring one or not? My vote is yes. And if you’re already hauling a spotting scope or you prefer to steady your binoculars with a tripod, problem solved. A solid hunting tripod will be perfectly suitable for a lightweight camcorder as long as it’s not super windy. If you’re zoomed in all the way on a distant critter at your maximum focal range you’ll definitely want a tripod. I also like to film my landscape shots on a tripod. Just be sure to bring along a second base plate for your camera and select a decent fluid head for your tripod that allows for smooth pans and tilts.
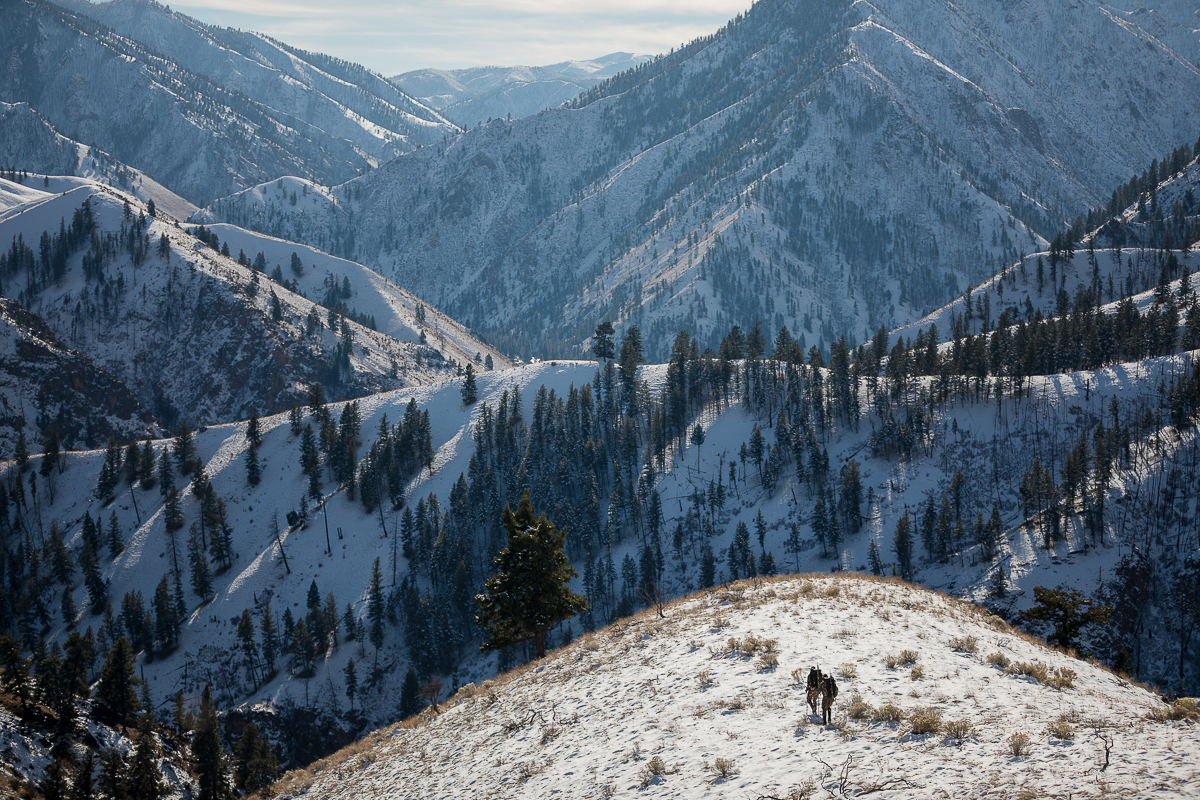 _Big, wide landscape shots like this can really help create a sense of the landscape_
Backcountry filmmaking — The cinematic filming kit
1\. Primary camera — Panasonic Lumix GH5
This is my current personal favorite camera for filming hunts in the backcountry. It was the camera that I used to capture the majority of the footage for our film “ Hunting the Last Wild Places: The Frank”. With a rugged build—it’s both splash-and dust-proof as well as freeze proof to 14°F—as well as a fairly compact form factor. I’m comfortable bringing my GH5 along on any extended backcountry outing. I’ve used it on multiple backcountry hunts and other extended outings in wild landscapes for the past two-and-a-half years and the camera still delivers the same stunning results.
My favorite feature of the GH5 is it’s powerful five-axis image stabilization system. This has allowed me to go tripod free for the majority of my filming, a handy feature when fast-changing situations don’t allow for pulling the tripod off my pack. I also appreciate cinematic images that come out of this camera. This was the first compact mirror-less camera system to sport both regular speed and slow-motion options in high resolution 4K.
Also beneficial is the camera’s solid battery life. Even in frigid conditions—which are notoriously hard on battery charges—I can typically get by with just two batteries during a long day of filming. Some might ask why not select the newer Panasonic GH5s over the GH5? While definitely sporting superior lowlight capabilities compared to the GH5, the GH5s doesn’t have internal sensor stabilization. I’d rather deal with some lowlight noise in my image than head into the backcountry without image stabilization. For this camera, I like to add some sort of external audio microphone to capture better in-camera audio.
While the GH5 is a fairly compact camera system, it’s nowhere near as light as the Sony camcorder I detailed in the minimalist setup above. That’s because as it’s an interchangeable lens camera system you will likely be carrying multiple lenses with you into the backcountry. Figuring out which lenses, and how many is always difficult. My most basic lens combination consists of:
1. wide-angle telephoto lens like the Lumix G X Vario 12-35mm f/2.8 II Lens from Panasonic (35mm full-frame equivalent of 24-70mm); 2. fast or wide aperture medium focal length lens for lowlight filming like the SLR Magic 25mm T0.95 HyperPrime Cine III lens (35mm full-frame equivalent of 50mm); 3. the Leica DG Vario-Elmar 100-400mm f/4-6.3 telephoto lens from Panasonic (35mm full-frame equivalent of 200-800mm)
Combined with the camera body, this camera and lens combo is a nearly six-pound setup. Compare that to the roughly two pounds for our lightweight option.
_\*To gain a better understanding of why we use the term "35mm full-frame equivalent" to discuss lens focal lengths, check out this great article)._
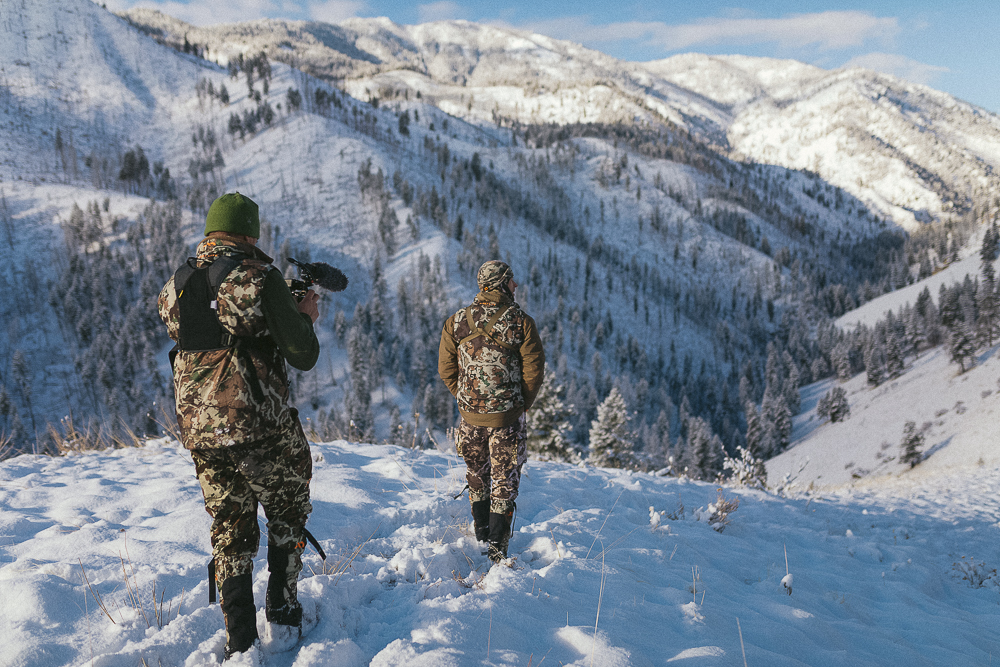
 _Film crew meeting in the wilderness_
2\. Action camera — DJI Osmo Pocket
I’m really excited to use this tiny, three-axis gimbal-stabilized camera from DJI on our hunts this year. It’s hard to believe that this camera films in 4K in both regular speed and slow-motion flavors and features POV, ActiveTrack and FaceTrack modes all in a 4.1-ounce, candy bar-sized package, but it does. The camera and gimbal sports both a small 1.08-inch LCD screen and the option to connect a smartphone for composing your shot. While I’ll definitely still be throwing in a GoPro for POV shots from a chest harness or on a head band, the DJI Osmo Pocket will definitely be my go-to option this year for dynamic, moving follow shots in the backcountry.
3\. Tripod — Manfrotto MVH500AH Head and MT190CXPRO4 Carbon Fiber Base
For a heavier cinematic camera system, a lightweight tripod that you use for your binoculars or spotting scope just doesn’t cut it in my opinion. Especially if you’re filming long distances at game animals with a larger telephoto zoom lens, you’re going to want a tripod that can handle the weight. This tripod setup is rated for video cameras up to 11 pounds, and it weighs just over five pounds altogether.
I Need More Power!
Battery power. It’s the one thing that keeps me awake at night, tossing and turning in my sleeping bag in a perpetual state of stress.
Should you just carry loads of extra batteries or a portable solar power kit like the one from Goal Zero. It depends on a number of factors, and many of them personal to your filming habits. But for me, if I am going to be heading into the backcountry for a long weekend of filming, I’ll likely leave the solar charger at home and just carry enough fully charged (very important!) camera batteries. For each day, I will generally start with one charged battery in the camera and a second close at hand in a pocket in case I need to quickly switch out.
If I am heading out on long backcountry filming adventure—four days or longer—I’ll bring a solar power bank (also fully charged prior to leaving) and a solar panel or two. Before I leave the tent for the day in the dark early morning hours I will set the power bank out in a waterproof stuff sack and the attached solar panels positioned in the best orientation possible to catch as much of the sun’s path across the sky.
Then, as soon as I arrive back in camp the race is on to charge as many batteries as I can from the power bank’s AC inverter before we head out the next day. This often involves me waking at least once at night to swap out a charged battery for a dead one.
Get out and film
One final note before we send you off to film your next hunting adventure. While it may sound strange to say this at the end of an article about selecting the best filming equipment, it’s important to remember that successful adventure filmmaking—or any type of filmmaking for that matter—is most of all about the story, not the gear. Hauling the best camera equipment miles into the backcountry will never compensate for a poor or nonexistent story. Before you set out from the trailhead with a rifle or bow in hand and a camera in your pack, be sure to have a strong sense for the kind of story you intend to tell.
If you have any questions on gear or equipment, leave them in the comments below.